Guest Post by Andrew Morris of Chemical Concepts
One trend on the rise in the architectural wall panel market is the use of hidden fasteners. Architects prefer hidden fastening systems because they create a clean, modern aesthetic, which is in stark contrast to the bulky, industrial appearance of exposed bolts and hardware. The problem is that achieving this look can be challenging when presented with the myriad of modern materials such as phenolic laminates, solid surfaces, composites and engineered stone products on the market today. We all know that “Z clips” are a great way to mount both interior and exterior wall panels, but how can we mount this hardware to many of these popular materials? While each wall panel product presents its own challenges, many of the common issues can be addressed using self-anchoring inserts. One product in particular that we will discuss in this article is the Keep-Nut anchoring system which has many unique advantages that make it well-suited for these applications.
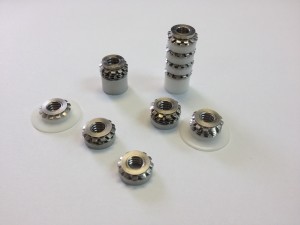
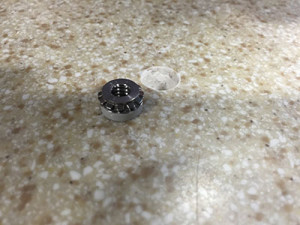
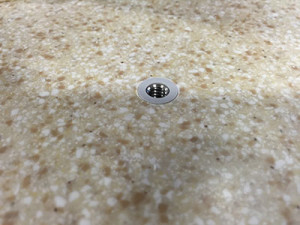
The Keep-Nut insert is an innovative fastener for high-strength anchoring in very hard substrates such as natural stone, composites, and hard plastics, where traditional fastening methods are often difficult or impractical. To install the anchors, a hole is drilled to a specified depth and diameter. The anchor is then hammered into place using a rubber mallet and the insert is ready for use. The holding power comes from rows of flexible metal spines that compressed as the anchor is inserted. In use, these metal spines apply force radially along the walls of the hole, achieving tensile strength levels of 250-1000 lbs per fastener depending on the model used. The anchor is made of stainless steel so it is suitable for use in both interior and exterior applications.
Selecting the Appropriate Anchor
The Keep-Nut is available in a variety of different models for different applications and materials. The first consideration is the thickness of your panel. One advantage of the Keep-Nut is that it can be used in panels of a variety of thicknesses including fairly thin panels down to 5.5mm (< 1.4â€). If using thin materials, select the variety with the appropriate minimum panel thickness. If using thicker materials make sure to select a variety that will provide the desired strength rating.
Another consideration is bolt and screw selection. The best way to fasten your hardware to the Keep-Nut insert is with threaded rod and hex nuts. The use of threaded rod, as opposed to a screw, is preferred as it allows you fully tighten your hardware to your substrate regardless of the thickness of your hardware. If a screw is preferred, you must be careful to source screws of the correct length. The trick is to make sure your screw length does not exceed the thickness of your hardware plus the thread depth of the anchor. For example, if you use a Keep-Nut anchor with a thread depth of 6mm (.24â€) and your hardware is ⅛†thick, your screw cannot not exceed .36†in length, otherwise you will bottom out the screw without being able to fully tighten down your hardware. Since screws of this length are not common you need to plan according. If you wish to use screws of a specific length, make sure to select a Keep-Nut with a larger thread depth to be compatible. Again, the use of threaded rod and hex nuts largely eliminates these concerns.
Preparing the Substrate
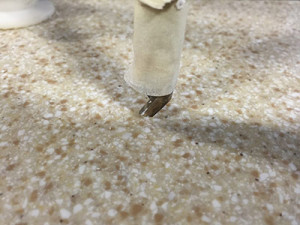
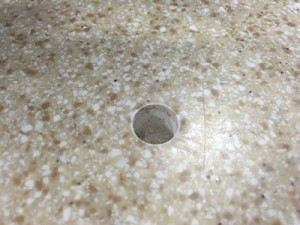
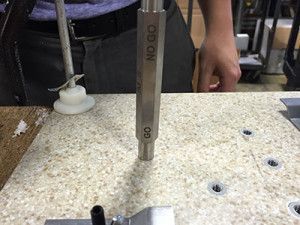
When using Keep-Nut anchors it is of paramount importance that the holes in your panels are drilled to the specified dimensions for the particular version being used. Both depth and diameter are important for proper performance. Most materials can be drilled using standard equipment and the recommend 11.8mm drill bit that is available wherever the anchors are sold. The use of a stop collar is recommended to ensure accurate and repeatable depth. On easy to cut materials, accurate holes can be drilled using standard cordless drills making field installs a breeze. Other materials may require a drill press, or a portable drill guide for best results. CNC routing equipment makes large scale jobs a cakewalk — simply use a ¼†routing bit and program the desired hole depth and diameter. Once your material comes off the machine, your anchors are installed in seconds with a few taps of a hammer.
Drilling natural and engineered stone requires a diamond bit. For stone a special 11.8mm diamond bit is available with a ½ Gas attachment for most CNC drilling equipment. Due to the inherent difficulty in drilling stone, special equipment may be needed for best results. Drilling by these holes by hand is possible but requires skill and should done by an experienced stone fabricator. No matter what type of panel you are using, you may want to pick up the Keep-Nut Hole Gauge which allows you to quickly determine whether your holes have been drilled to the correct size. See below for a step by step illustration showing the Keep-Nut anchors being installed in Corian brand solid surface.
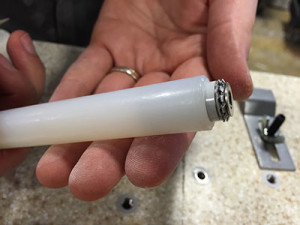
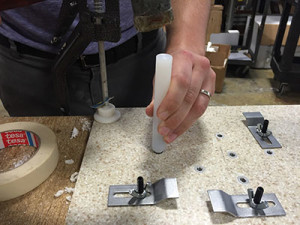
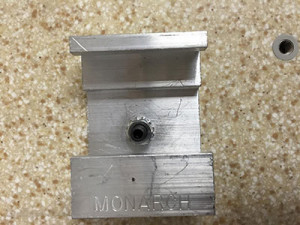
The Keep-Nut anchor is available in a variety of models for different applications.This example shows a Keep-Nut anchor installed in Corian, which is solid surface material made from acrylic.Drill a hole using the recommended diameter bit. Be sure the hole is drilled to the correct depth. We also recommend using a stop collar.This shows a completed hole.The hole can then be tested using the Keep-Nut Gauge to ensure correct depth and diameter.This is a Keep-Nut fastener next to prepared hole.The fastener is then threaded onto the optional setting tool. The setting tool installs the Keep-Nut easily and accurately while reducing the likelihood of striking the panel directly with the hammer and causing damage.The fastener is then installed using a mallet or hammer.The insert is now ready for use and the Z clips can be installed on the panel.Z clip mounted using hex nut and short threaded rod.
Well, that about wraps up our overview of the new Keep-Nut self-anchoring insert. For more information on this fastening system, contact the US master distributor Chemical Concepts, inc. or check out their website at chemical-concepts.com.